After Substack so brilliantly botched its response to criticism of Nazis and alt-right writers profiting on its platform, I knew the time was past due for me to make the leap to a platform of my own. I chose Ghost, because it's open source software developed by a nonprofit. Also: Free, and incredibly easy to set up on some affordable hosting providers.
There are plenty of guides, tips and message board threads about the process of moving from Substack to Ghost, but all of them only offered me a piece of the process. So along the way I documented every step I took in exporting my Substack newsletter, spinning up an affordable Ghost installation, setting up Mailgun for email sending, Cloudflare for caching, and other bits and pieces. Here's the whole process front to back. Hopefully it'll help you!
A quick self-hosting pricing overview
The setup in this guide will cost:
- $2.50 per month for hosting (scaling up to about $5 per month if you get heavy traffic)
- $1 per 1,000 emails you send (or if you're high volume, $35 for 50,000 emails per month)
This makes it an ideal affordable setup for small newsletters or those that send, say, one email per week. If you have thousands of subscribers and send multiple emails per week, your costs will naturally scale up. But you'd only need a handful of paid subscribers to cover the costs—less than the 10% cut that Substack takes of paid subs. There are zero fees for using Ghost when hosting it yourself.
There are several paid hosting options that will take care of the Ghost and email setup for you. They'll all cost more than hosting your site yourself in most situations, but are of course less work! If you just want something turn-key, check out Ghost Pro, Midnight, Gloat and Magic Pages and see if their pricing feels right for the scale of your newsletter.
The rest of this guide will assume you've decided to self-host.
What you'll need
- Your own domain (I recommend Porkbun as a very affordable, small business registrar)
- A Pikapods account
- A Mailgun account
- A Cloudflare account
Pikapods initial setup
Starting a Ghost site on Pikapods is incredibly easy, and they start you off with $5 credit which will cover a month or two of hosting off the bat, so it won't cost anything to give it a try. Register with just your name and email, then login.
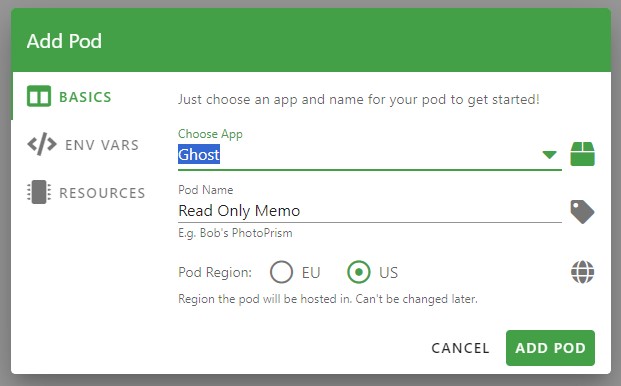
- In Pikapods, click Add Pod, then select Ghost from the drop-down. Give it a name (not public) and choose if you want a US/EU server.
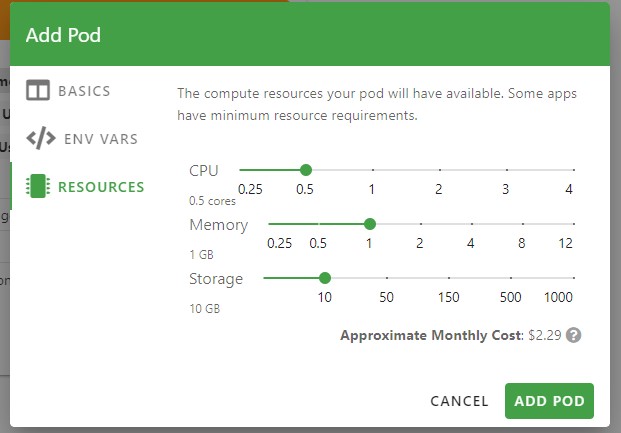
- Click Resources, and bump Memory up to 1GB, which Ghost recommends. Unless you get a large amount of web traffic, you can leave CPU and storage unchanged. (You can easily increase this later, or even adjust it temporarily on days you send out a newsletter.) Now click Add Pod.
- Follow the link in the orange text to visit the setup page for your new Ghost site and create an account. It's that easy—the site is now alive and ready to be customized! Once we get it all tricked out, we'll eventually come back to these basic pod settings to configure our custom domain and some important email bits.
Importing posts and subscribers from Substack
- Once you've logged into your new Ghost dashboard, scroll down to Import/Export. Open the Substack migrator. This includes posts, subscribers, stats, etc.
- Type in your Substack address and follow Ghost's guide to export your data.
- Note: If you use a custom domain on Substack, this process works better if you type in your Substack subdomain instead (e.g. readonlymemo.substack.com).
- Click Ghost's export link to jump straight into your Substack settings and start downloading an archive of your posts. It may take several minutes; Substack will email you a download link when it's ready. When you get the download link, upload the .ZIP file to Ghost.
- Note: There was a weird bug in Ghost's code here that wouldn't recognize a .ZIP uploaded from a Windows PC. It should be resolved now, but if you get an error, do this step on your smartphone instead. Download the .zip file from your email account, go to your Pikapods Ghost URL, login, and use the migrator.

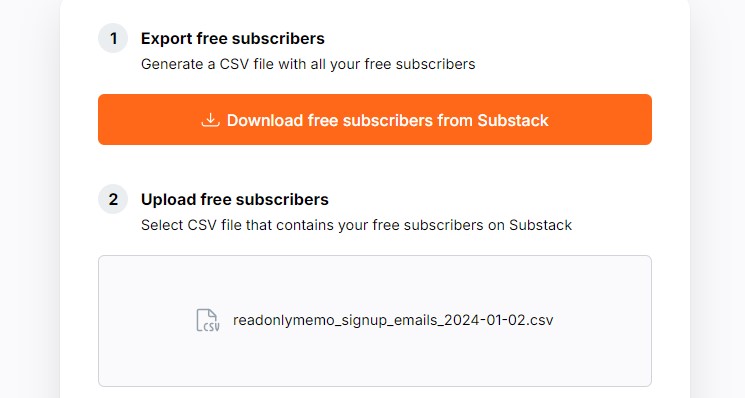
- The next step will give you an orange link to click to download a .CSV of your free subscribers from Substack. Click it, then upload the file.
- The final step will give you an orange link to click to download a .CSV of your paid subscribers. Again, just click it, then upload the file.
- You should now have all of your subscribers and old posts imported into Ghost!
- Once you've done this, if you use a custom domain on Substack, I'd suggest removing it from your Substack page so that your Substack reverts to its subdomain. Otherwise, a bit later when we enter that domain into Ghost, you'll be unable to access your Substack writer dashboard without the help of Substack support. You can change this under your Substack dashboard Settings > Domain.
Customizing your Ghost site design
- Optional: You may wish to make your new Ghost install private while you get it up and running. Currently it's on a placeholder domain, so no one's going to stumble upon it. But once we set up our real domain later it'll be findable online. From the Ghost dashboard, click the gear icon in the bottom-left corner for Settings, then find Make this site private in the options. Click edit, hit the switch, and set a password. Then hit Save.
- Ghost's default theme actually looks quite a bit like Substack out of the box, with similar magazine/list layout options. There are lots of themes you can experiment with to change up the look dramatically, but for simplicity I'd suggest using the default theme for now just to get up and running. Still in Settings, first set your Title and Description. I just copy/pasted my Substack "Publication name" and "Short description."
- Now scroll down to Design & Branding to jump to that section. Click Customize.
- On the Brand tab, again set your Site description. For Accent color, set your Accent color from Substack. Upload your Publication icon and a Cover image if you wish.
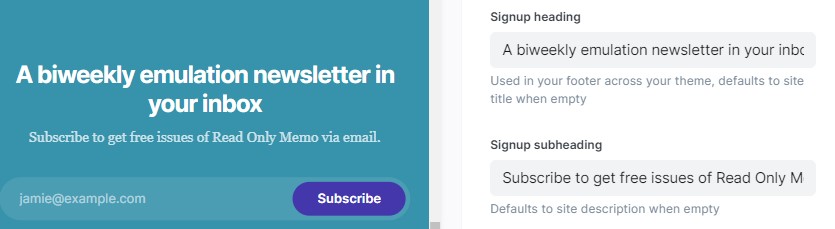
- On the Site wide tab, click the color wheel to set your Site background color from Substack. You can also write a custom Signup heading and Signup subheading if you want a different call to action in your site footer.
- On the Homepage tab, you can choose some more layout options. Make sure to click Save when you're finished.
- Back on the main settings menu, you may also need to edit your Navigation to set links to any permanent pages you have; these should've imported from Substack with the same exact name/URL you had set there. Just type that address in here to add it to your nav.

- The only page that didn't copy over from Substack during the import process was my About page, maybe because Ghost had one sitting on that URL already by default. If it's the same for you, return to the Ghost Dashboard, click Pages, and then "About this site" to edit the post. On Substack, go to your About page, click Edit, and copy. Back on Ghost, paste it in. It worked almost perfectly for me, even copying over images, which I spent about a minute tidying up.
Pikapods and Cloudflare: Setting up your custom domain and CDN
- Back on Pikapods, click on your Ghost pod and navigate to the Domain tab. Hit the toggle next to Enable Custom Domain and type in your spiffy new address. Now copy the CNAME record below and head over to your domain registrar of choice and edit your DNS settings. Here you'll need to create or edit a CNAME entry to point the domain at your pod. Here's what that looks like in my registrar Porkbun.


- Save your CNAME record at your domain registrar, then save at Pikapods, too. Your domain should now be live and headed to your Ghost site!
- With the domain set, we want to add Cloudflare as a CDN (essentially a cache that makes our website load more quickly and lowers the strain on our server).
- Sign up for Cloudflare and click Add site at the top. Then type in your custom domain name (e.g. readonlymemo.com). Hit continue.
- Scroll down to the Free plan and select it.
- On the next page, Cloudflare should've pulled in your DNS records. Next to the CNAME entry for your Pikapod, click the orange toggle to disable the Proxy service. This is just temporary, as Pikapods says "When first adding a custom domain via Cloudflare, ensure the Proxy feature is disabled. Else we can’t verify the DNS settings of your domain. You can enable proxying again after adding the custom domain." Now click Continue.

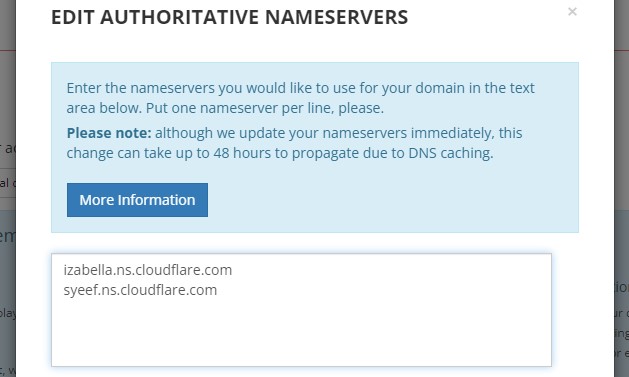
- On the next page, Cloudflare will list two nameservers that you need to copy over to your domain registrar. There should be a setting for Authoritative Nameservers (in Porkbun it's a small link named "NS" under your domain name). Find that, and copy/paste the Cloudflare nameservers. Save.
- Back on Cloudflare, hit continue to move on to the Quick Start guide. Click Save a few times without changing anything, then Finish.
Mailgun setup guide
- Create an account with Mailgun with the Foundation Trial, which won't cost you anything initially. This will be easiest if you provide a credit card up front to get on the Foundation Trial tier. If you decline to add a credit card, your permissions are limited for sending out mass emails (they're worried about spammers) which can cause problems.
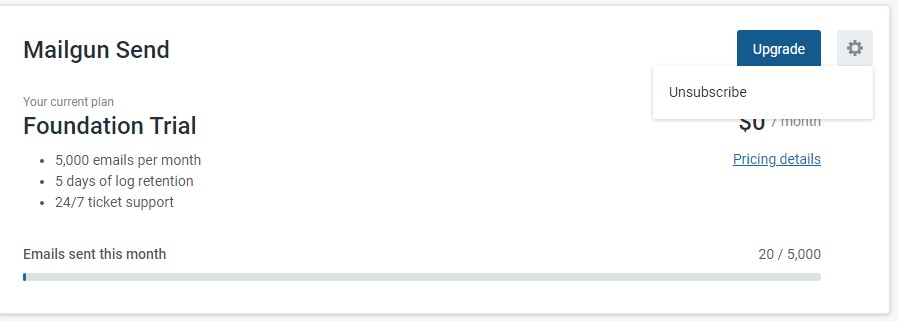
- The Foundation Trial gives you 5000 free emails for the first month, then will roll over into a $35/mo fee. Smaller newsletters will want to downgrade their account: Once signed up, you can click Plan & Billing from the menu, then click the gear icon next to Upgrade and hit "Unsubscribe." This will let you switch to the Flex plan where you pay $1 per 1000 emails sent.
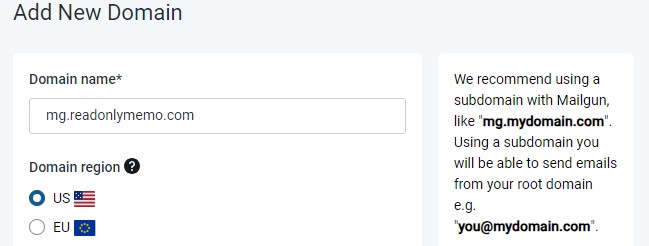
- Under the Settings menu, click Domains, and Add new domain. Mailgun suggests creating a subdomain for your email server; I'm just using the suggested mg.readonlymemo.com and clicking Add.
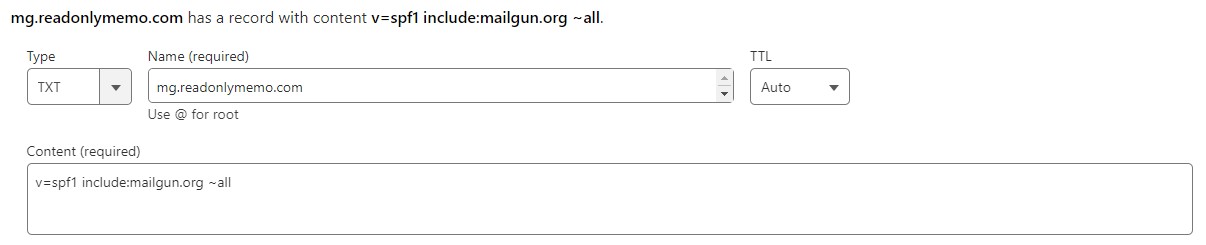
- Head back to Cloudflare to update your DNS records. Copy the SPF entry from Mailgun into a TXT record like this. Hit Save.
- Now create another TXT entry for the DKIM, copying the hostname and the value. Hit save.
- Add MX records rather than TXT for the next entries. Again, just copy/paste, including filling in the priority as 10.
- Now we're going to add a CNAME record for tracking. This will allow you to collect data on openings, clicks and unsubscribes. Copy/paste once again, and click the orange dial to turn off the proxy. Here's all of mine created and saved in Cloudflare.

- Close to finished now! From your Mailgun dashboard, click API keys (or that link) and create a new API key. Make sure to copy it before closing the window.

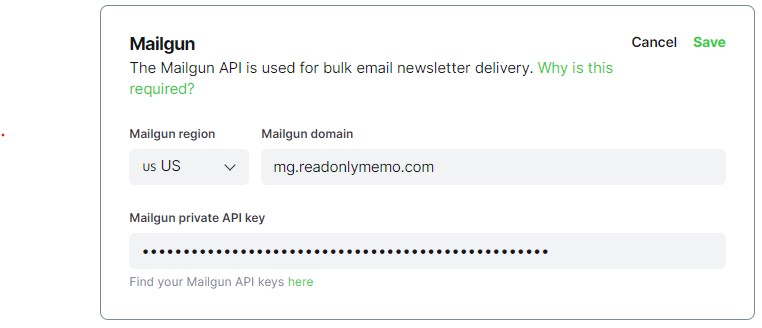
- Jump over to your Ghost Dashboard and scroll down to the Newsletter section. Under Mailgun settings, click edit and paste in your API key. Type your Mailgun domain (if you followed the example above, mg.yourdomain.com). Hit save.
- You're almost able to send newsletters now, though it may take a bit for the DNS records to propagate (as long as 48 hours, though usually much faster). Mailgun will send you an email when everything's ready. However, there are a few things we'll still want to do to improve your success rate and limit spam issues.
- There's one other kind of email we need to be able to send, too, and that's a Transactional email—the kind people get when they sign-up for your newsletter and get a confirmation mail or have to reset a password. Those work a bit differently than bulk mails, so we have to do one more thing to set them up. Pikapods has a very easy to follow guide, but I'll reiterate it. First, in Mailgun, click Domain Settings from the side menu and then the SMTP Credentials tab.
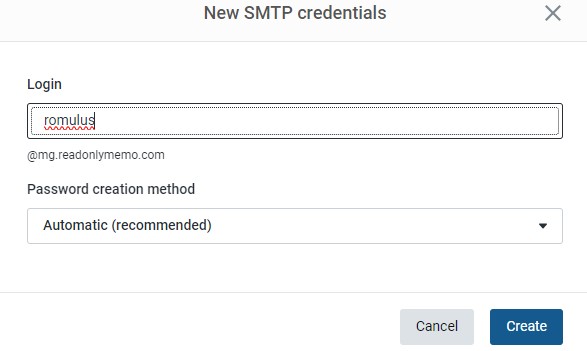
- Click the blue text at top-left that says Add New SMTP user. Give this user a name and leave the password creation Automatic.
- A gray box will pop up in the bottom-right corner telling you a new password has been created. Leave it there for a second.
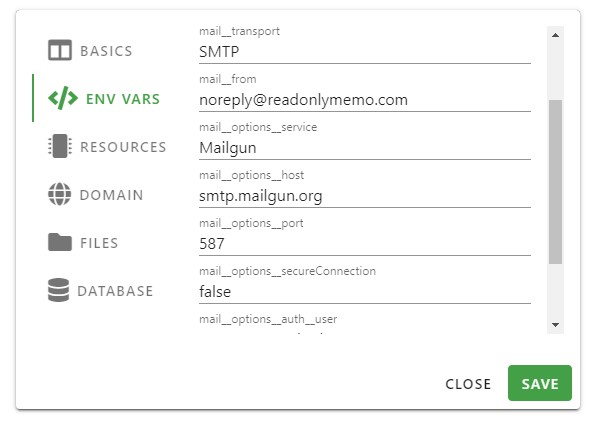
- Open your Pikapods Dashboard and go to the ENV VARS tab for your Ghost pod. Now we're going to type in or copy/paste the following. Copy the text after the colons below; the bolded bits are the ones you need to change to suit your site. Hit save when you're done.
- mail__transport: SMTP
- mail__from: noreply@yourdomain.com
- mail__options__service: Mailgun
- mail__options__host: smtp.mailgun.org or smtp.eu.mailgun.org (for US or EU server location)
- mail__options__port: 587
- mail__options__secure: false
- mail__options__auth__user: [email protected].
- mail__options__auth__pass: The password shown in the grey box on Mailgun
- We're allllmost done with email, but there's one thing we want to do to make our newsletter sending experience better. Back in Mailgun's SMTP credential's tab, click "Add new SMTP user" and type in the email address you'd like readers to see in their inboxes when they get your newsletter. This could be "yourname" or "newslettername" or something else. Type it in and hit create.
- I recommend also creating another SMTP user you name "support" or whatever address you'd like users to see when they want to email you for help with your site.

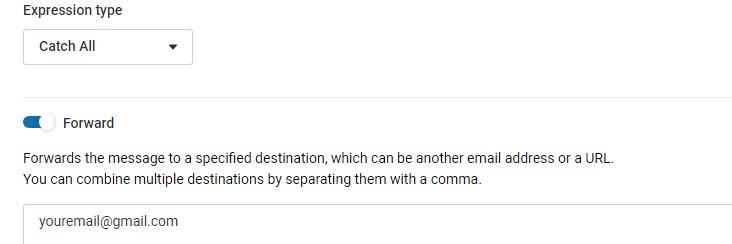
- Now click Receiving in the left-hand Mailgun menu, and in the top-right corner click "Create route." Leave the "Expression type" as Catch All, tap the "Forward" toggle, and type in your Gmail address here (or whatever inbox you'd like to have Ghost forward messages from readers to). Then at the bottom click Create route to finish it.
- Done with Mailgun! But there's one more DNS record we want to add to Cloudflare to signal that our emails aren't spam, and that's a DMARC record. This is a kind of confusing bit of extra email security you can read about in detail, but basically, the version we're implementing won't do anything except signal to mail services "hey, I'm pretty trustworthy!"
- Head to Postmark, a free service for creating a DMARC record. Type in the email you just created above for sending your newsletter, along with your domain, and hit "Get started for free." Now copy the code here and create a new TXT record in Cloudflare. Save it, wait 30 seconds or so, and then click "Verify" on Postmark. Congratulations on looking legit 😎

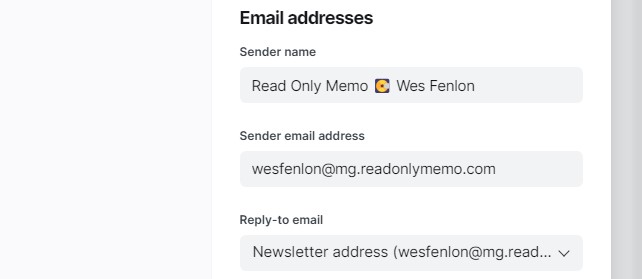
- Head over to Ghost's Settings. Click Newsletters in the menu, then edit on your newsletter. Here you'll see an option for "Sender email address" that has probably defaulted to [email protected]. Type in the email you created at Mailgun above, e.g. yourname@mg.yourdomain.com. Hit Save. Ghost will send you a confirmation link. Because we created that forwarding route in Mailgun, within 30 seconds it should appear in your Gmail (or other) inbox. Click the link to confirm your address!
- Refresh your Ghost browser window. You should now be able to select your new Sender address as the Reply-to email as well, which means anytime someone responds to your newsletter, it will be forwarded to your real inbox.
- Last step: we're going to do this same thing for the sign-up portal. From the Ghost settings menu click "Portal settings" and then "Customize." Click over to the Account page tab and type in [email protected] or whatever other SMTP credential you created above. Ghost will again email you a confirmation link, which should be forwarded to your inbox. Email: conquered.
Remove Substack's fee from paid subscribers
You need to submit a request to Disconnect your Stripe account from Substack Support here, which won't cancel or refund any subscriptions. This may take Substack Support a few days to go through with. Afterward, you'll want to revoke Substack's access to Stripe. Here's the advice straight from Ghost:
Once fees have been removed, and you have completed your migration, you should disconnect Substack from Stripe - to prevent subscriptions from getting out-of-sync in future. You can do this by going to https://dashboard.stripe.com/account/applications — and clicking on Revoke Access.
Setting up Stripe for new paid subscribers
I run a free newsletter, so I don't have experience with this myself. But you can follow this guide from Ghost to connect to Stripe for paid subscriptions.
Setting up Cloudflare caching to load way faster
- There is some secret sauce to self-hosting—why should you actually handle all the traffic of people reading your stuff when Cloudflare can do it for you? Thanks to Cloudflare's free caching, we can keep our Pikapod specs very modest, paying only a couple bucks a month, while letting Cloudflare cache our pages and serve them to the vast majority of readers.
- Follow this guide from TechWeirdo carefully to enable some savvy Cloudflare caching. (Remember to replace any instance of the guide's URL with your own Ghost site).
- After following that guide, make sure the following settings are enabled:
- Caching > Tier Cache > Smart Tiered Caching Topology enabled
- SSL/TLS > Overview > Full
- DNS > Records > Hit edit next to CNAME and enable the Proxy dial. Save. The Orange "Proxied" cloud should now show next to your website's A record and Pikapods CNAME. Here's what my Cloudflare ended up looking like (note that it includes a couple TXT records for stuff like my Bluesky verification, which is unrelated to this guide, so don't freak out if yours is slightly different!)

Wrapping up
Hopefully this process goes as smoothly for you as it did for me. I did have a couple odds and ends to clean up in Ghost that you may want to tackle as well:
- My tags didn't come across in the import process. I just retyped these manually which took a couple hours while watching TV. If you have a ton of posts and a ton of tags, you may want to look into a way to do this automatically, but it wasn't a big deal for me.
- The URL structure to my posts changed from Substack to Ghost, and Google was still seeing the old URLs, leading to 404s. This probably would've resolved itself in time, but it also means old links on social media, Reddit, other places you've posted your stuff will be broken too. I followed Ghost's guide to implementing redirects which involved typing in a list of URLs in Notepad++ and uploading it as a .yaml file under Ghost Settings > Labs > Beta features > "Upload redirects file."

- If there's any part of this process you'd like to read about in more detail, check out Molly White's post over on Citation Needed.